
On this page
- 1
Find the matching proxy details in My Proxies
Sign in to Dashboard → My Proxies. Find the proxy you want to use and click Switch format under Proxy parameters to view its HTTP or SOCKS5 connection details. Note the connection address, port, username, password, and the IP address for the final check. Use your own values, not the masked example below.

Example only: the values are masked. Use Switch format to view the connection details in the format you need. Open the full-size Dashboard example Use the connection address and port for the protocol selected in the browser. Keep the IP address shown in My Proxies to compare with the browser’s exit IP after setup.
Keep proxy credentials private. Do not share a screenshot with your real username or password.
- 2
Open the browser environment
Choose 新建环境 → 浏览器环境. For an existing environment, use 修改代理 in its proxy area.
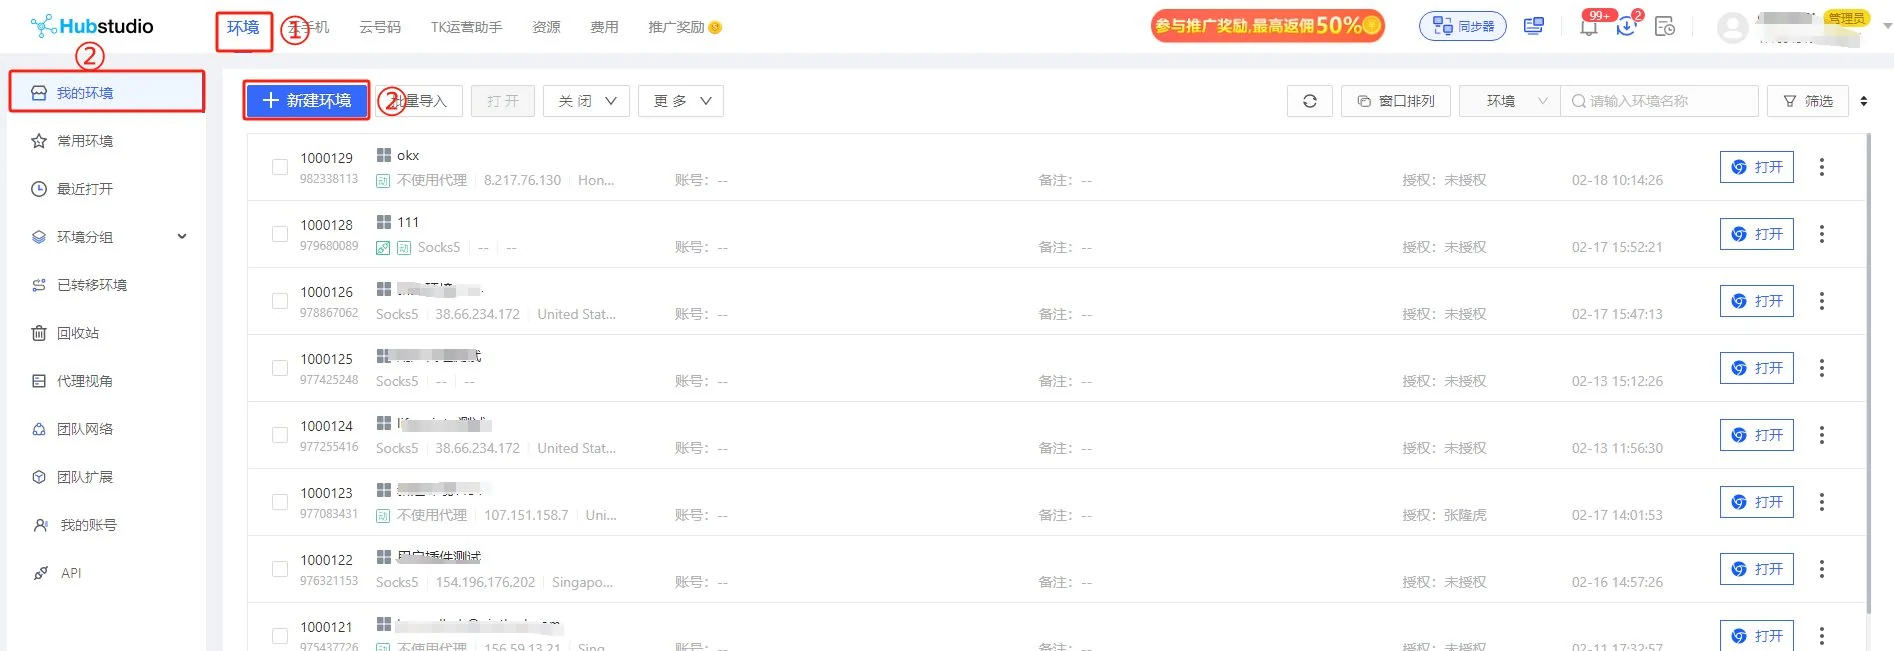
Official HubStudio interface example. Use your own proxy details. Open the full-size browser screenshot · Official image source - 3
Select a custom HTTP(S) or socks5 proxy
Set 代理方式 to 自定义, then choose http or socks5 in 代理类型 to match Dashboard.
- 4
Enter host, port and credentials
Enter the address in 代理主机, port in 代理端口, username in 代理账号, and password in 代理密码.
- Host
- 代理主机
- Port
- 代理端口
- Username
- 代理账号
- Password
- 代理密码
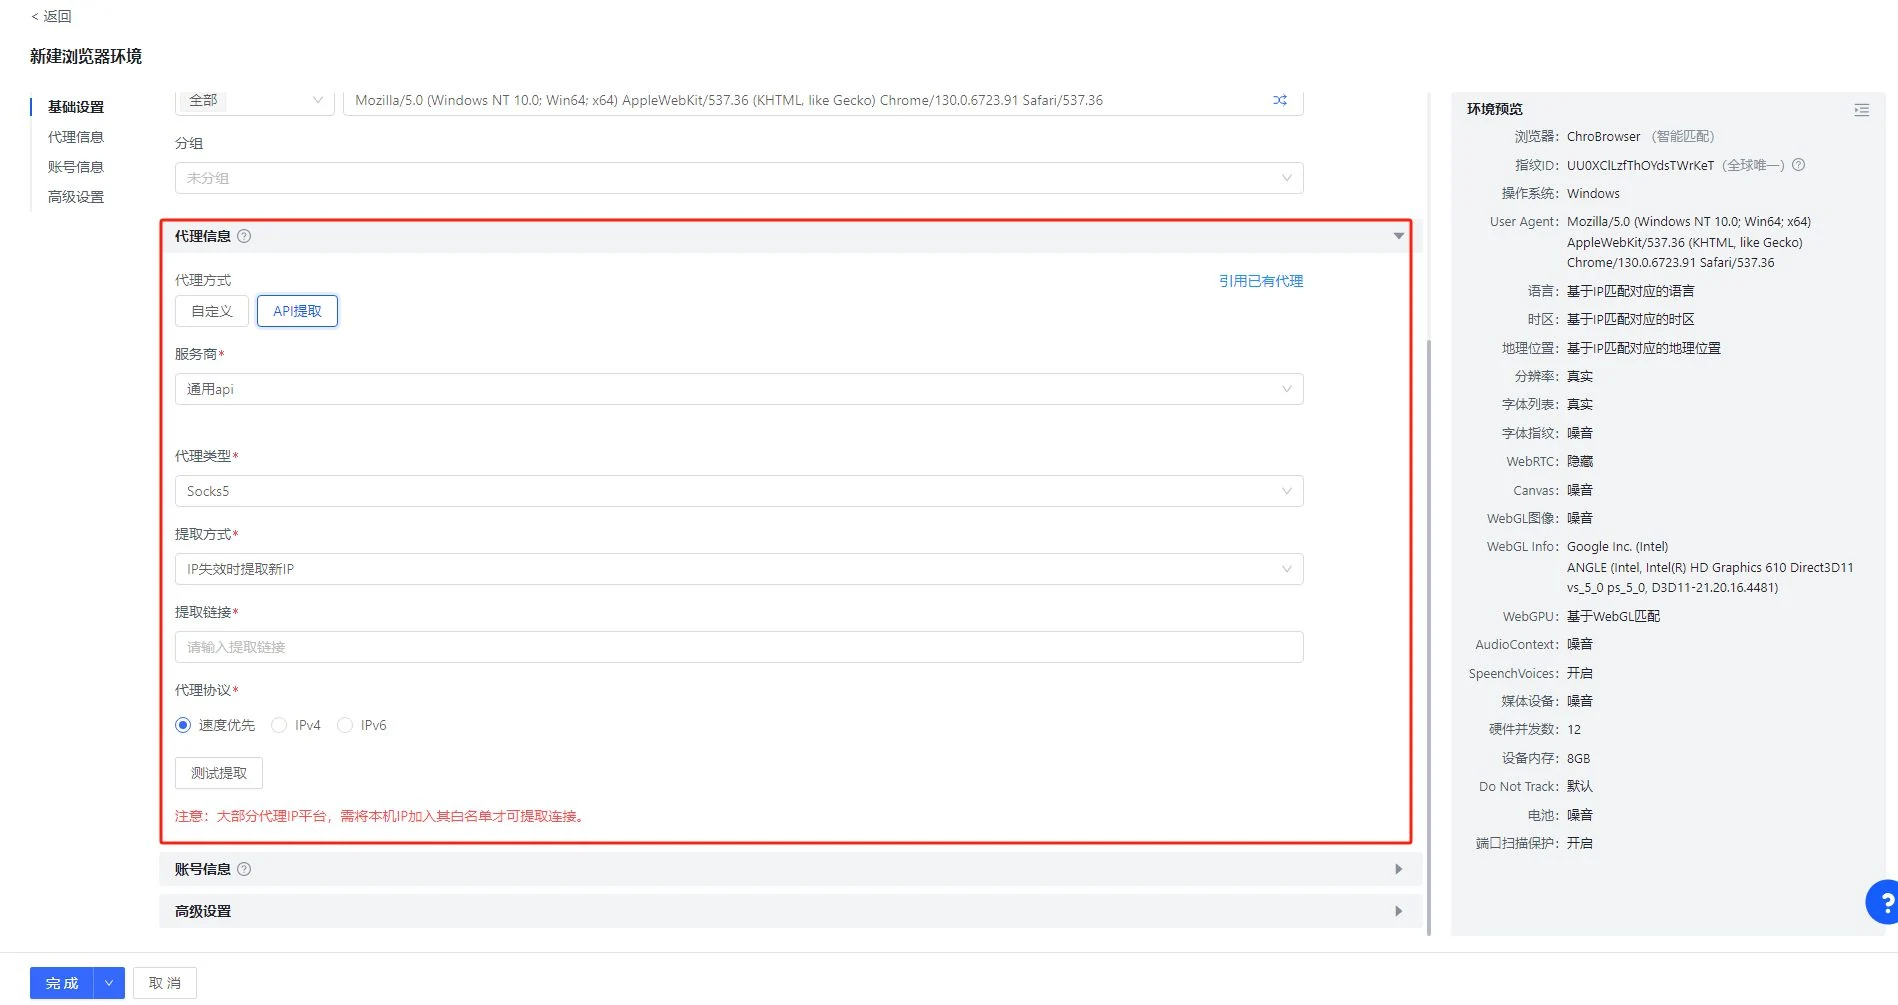
Official HubStudio interface example. Use your own proxy details. Open the full-size browser screenshot · Official image source - 5
Check the proxy
Click 检测代理 and wait for a passing result.
- 6
Save and launch the environment
Save this environment, then click 启动环境 for the same one.
- 7
Verify the exit IP
Check the exit IP inside the environment and compare it with My Proxies.
In the profile you just opened, enter this address to see its public IP: api.ipify.org
Troubleshooting
If 检测代理 fails, reopen the proxy settings for this environment and check that the type matches the HTTP or SOCKS5 format in Dashboard and all four values belong to the same proxy.
Check the browser’s current interface
Reviewed against the official browser documentation on the date shown above. The connection has not been tested in the browser app; controls may differ by version.
- Official websiteHubStudio official website
- Official setup documentationHubStudio proxy setup documentation