
On this page
Check your prerequisites
Make sure your existing node works on its own and you have the connection details for your GetIPProxy SOCKS5 proxy.
A working Clash node
Connect through the node to confirm it works, then copy its exact name from your configuration. You will use that name in the new proxy entry.
GetIPProxy connection details
In Dashboard → My Proxies, find the proxy address, port, username, and password you need for this configuration.

Keep your proxy username and password private. Do not share screenshots that show them.
Sign in to Dashboard →Save an editable copy of your configuration
If your existing nodes come from a subscription URL, save the complete Clash/Mihomo YAML configuration as a local file before editing it. Keep the original subscription URL.
- Download the complete Clash/Mihomo YAML configuration from your provider, or ask the provider for it. A list of individual proxy links is not a complete configuration file.
- Save a local copy and open it in a text editor. Keep the existing nodes and other settings.
Your local copy will not update automatically when the subscription changes. If you download a new configuration later, add the GetIPProxy entry to that copy as well.
Add the GetIPProxy proxy to your configuration
Find the existing proxies: list and add the entry below at the same indentation level as the other proxies. Keep the existing entries, and do not add a second top-level proxies: key.
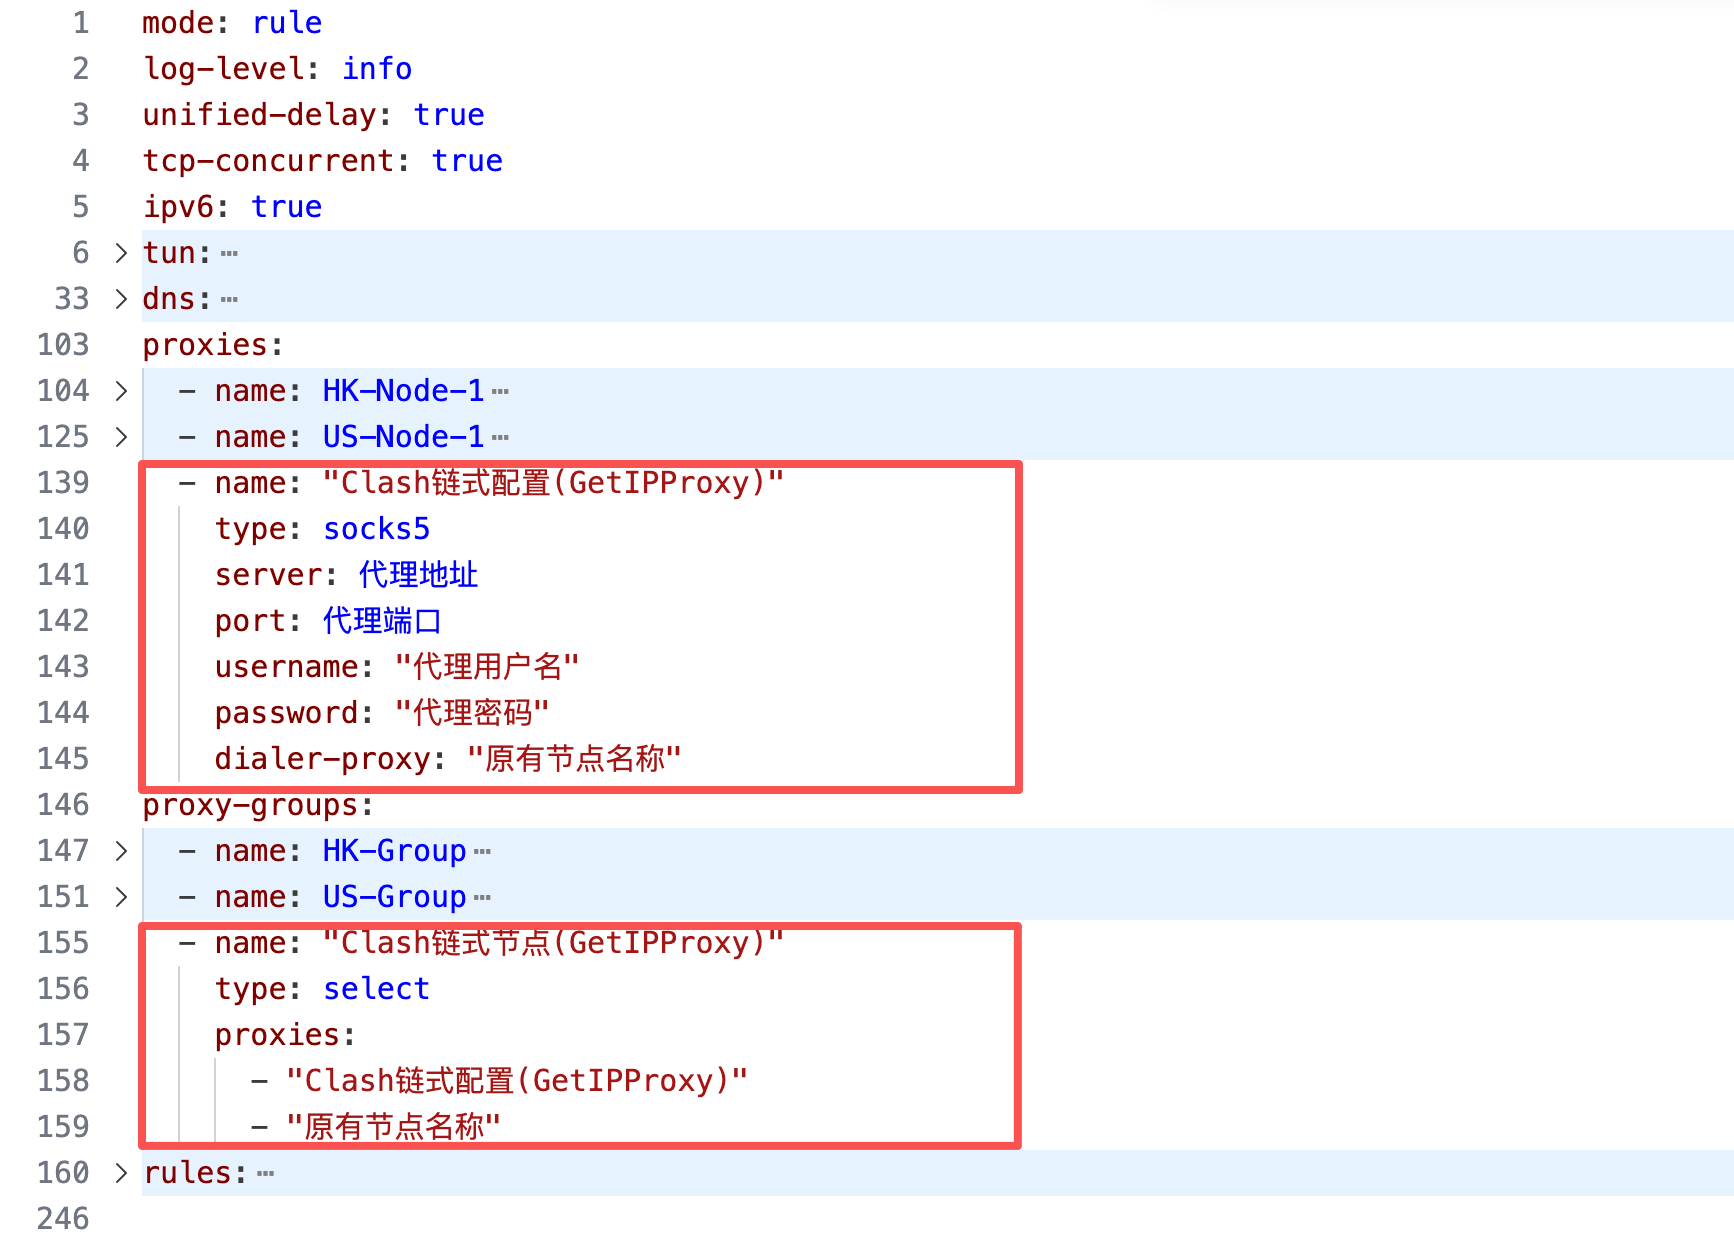
The lower red box shows an optional proxy group for rule mode. For your first test in Global mode, add only the entry under proxies:.
  - name: "Clash Proxy Chain (GetIPProxy)"
    type: socks5
    server: "SOCKS5 代理地址"
    port: 12345
    username: "YOUR_USERNAME"
    password: "YOUR_PASSWORD"
    dialer-proxy: "YOUR_EXISTING_NODE"
server / port- Enter the SOCKS5 proxy address and port from My Proxies. Use a number for the port.
username / password- Enter your proxy credentials. If your proxy does not require authentication, remove both lines.
dialer-proxy- Replace YOUR_EXISTING_NODE with the exact name of your working Clash node. Mihomo uses that node to connect to the GetIPProxy proxy.
The configuration screenshot uses the old Simplified Chinese node name. Use “Clash Proxy Chain (GetIPProxy)” from the YAML example; this is the name to select in the app.
Replace “SOCKS5 代理地址” with the SOCKS5 proxy address shown in Dashboard → My Proxies.
Select Clash Proxy Chain (GetIPProxy) in the app
Import the edited local YAML file as a profile and activate it. Then switch to Global mode and select “Clash Proxy Chain (GetIPProxy)” from the GLOBAL list.
Use the edited local profile in FlClash before you set Outbound mode.
The screenshots use a Simplified Chinese interface and may show the old node name. Menu labels may also differ by app version. Select “Clash Proxy Chain (GetIPProxy)” from your YAML.
- 1
Import the edited YAML
Open the Config tab at the bottom of FlClash. Use Import from file to choose the edited YAML saved on your Android device; importing the original subscription would omit the new node.
- 2
Select the profile and connect
In Config, select the newly imported profile as the one in use. Return to Dashboard, start the connection, and approve the Android VPN request if prompted.
- 3
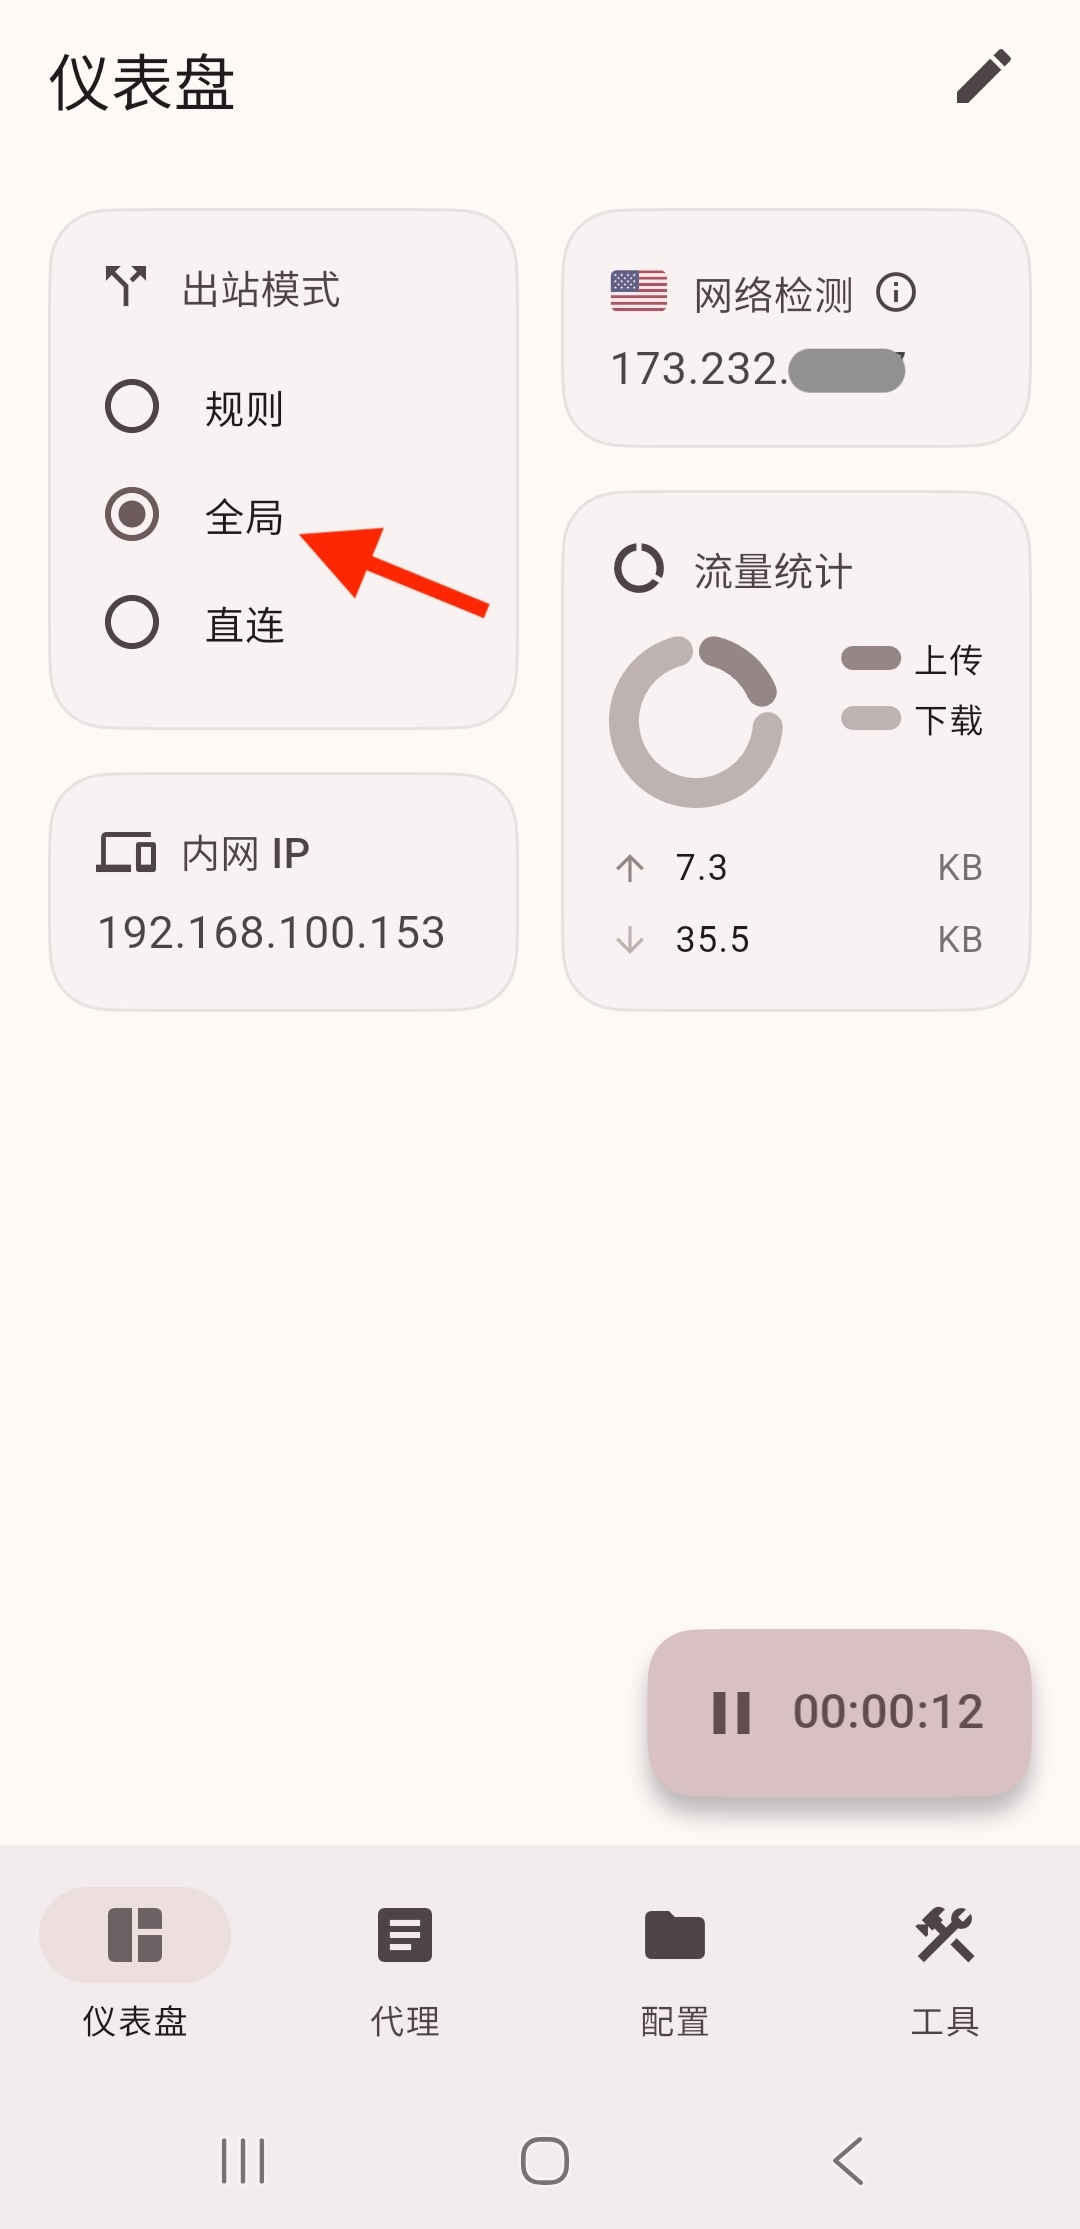
Set Outbound mode to Global
On Dashboard, set Outbound mode to Global. The screenshot shows Global selected.
- 4
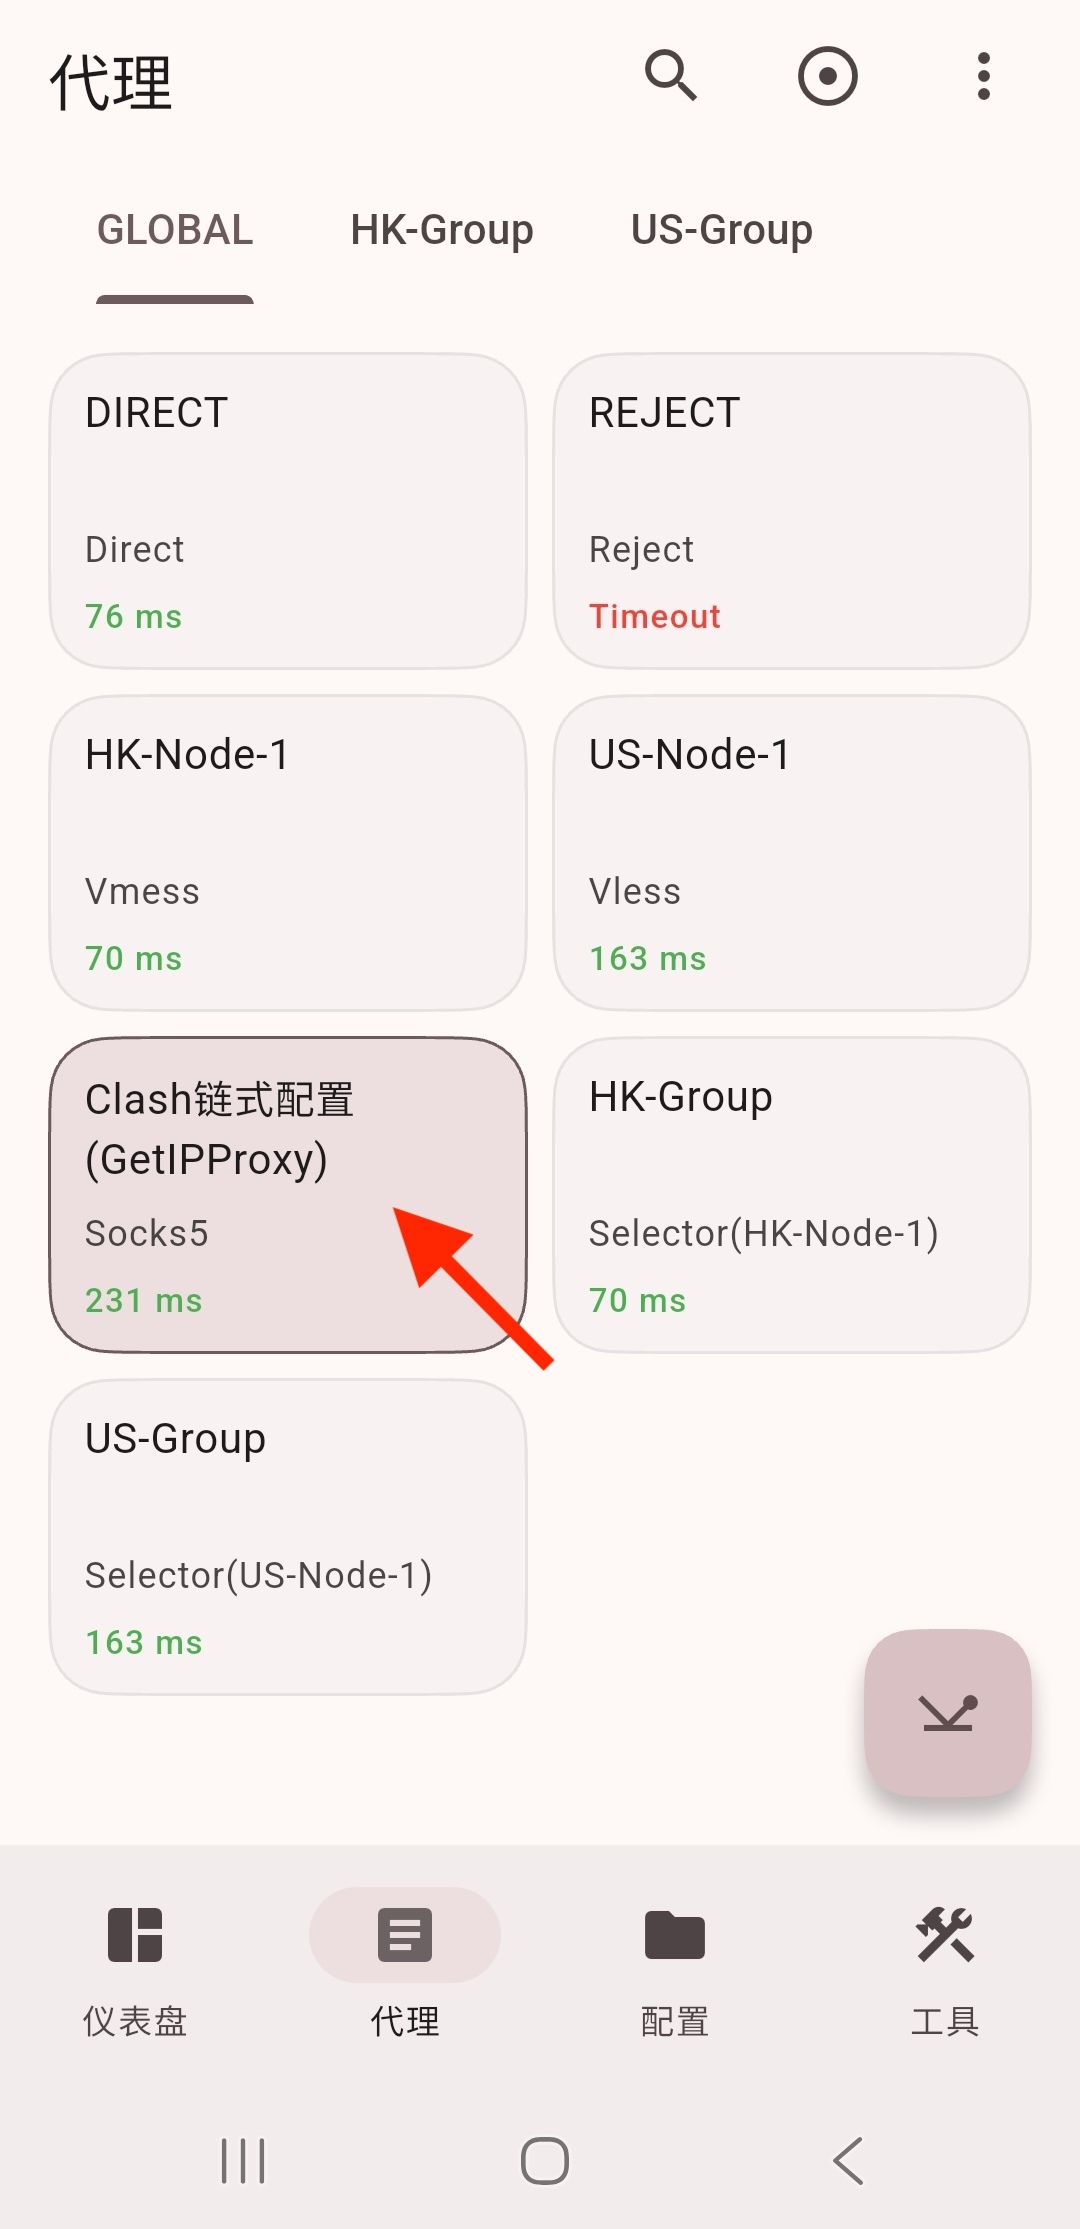
Select Clash Proxy Chain (GetIPProxy)
Open the Proxy tab → GLOBAL and select “Clash Proxy Chain (GetIPProxy)”. The selected node should be highlighted before you check the IP.
Check your exit IP
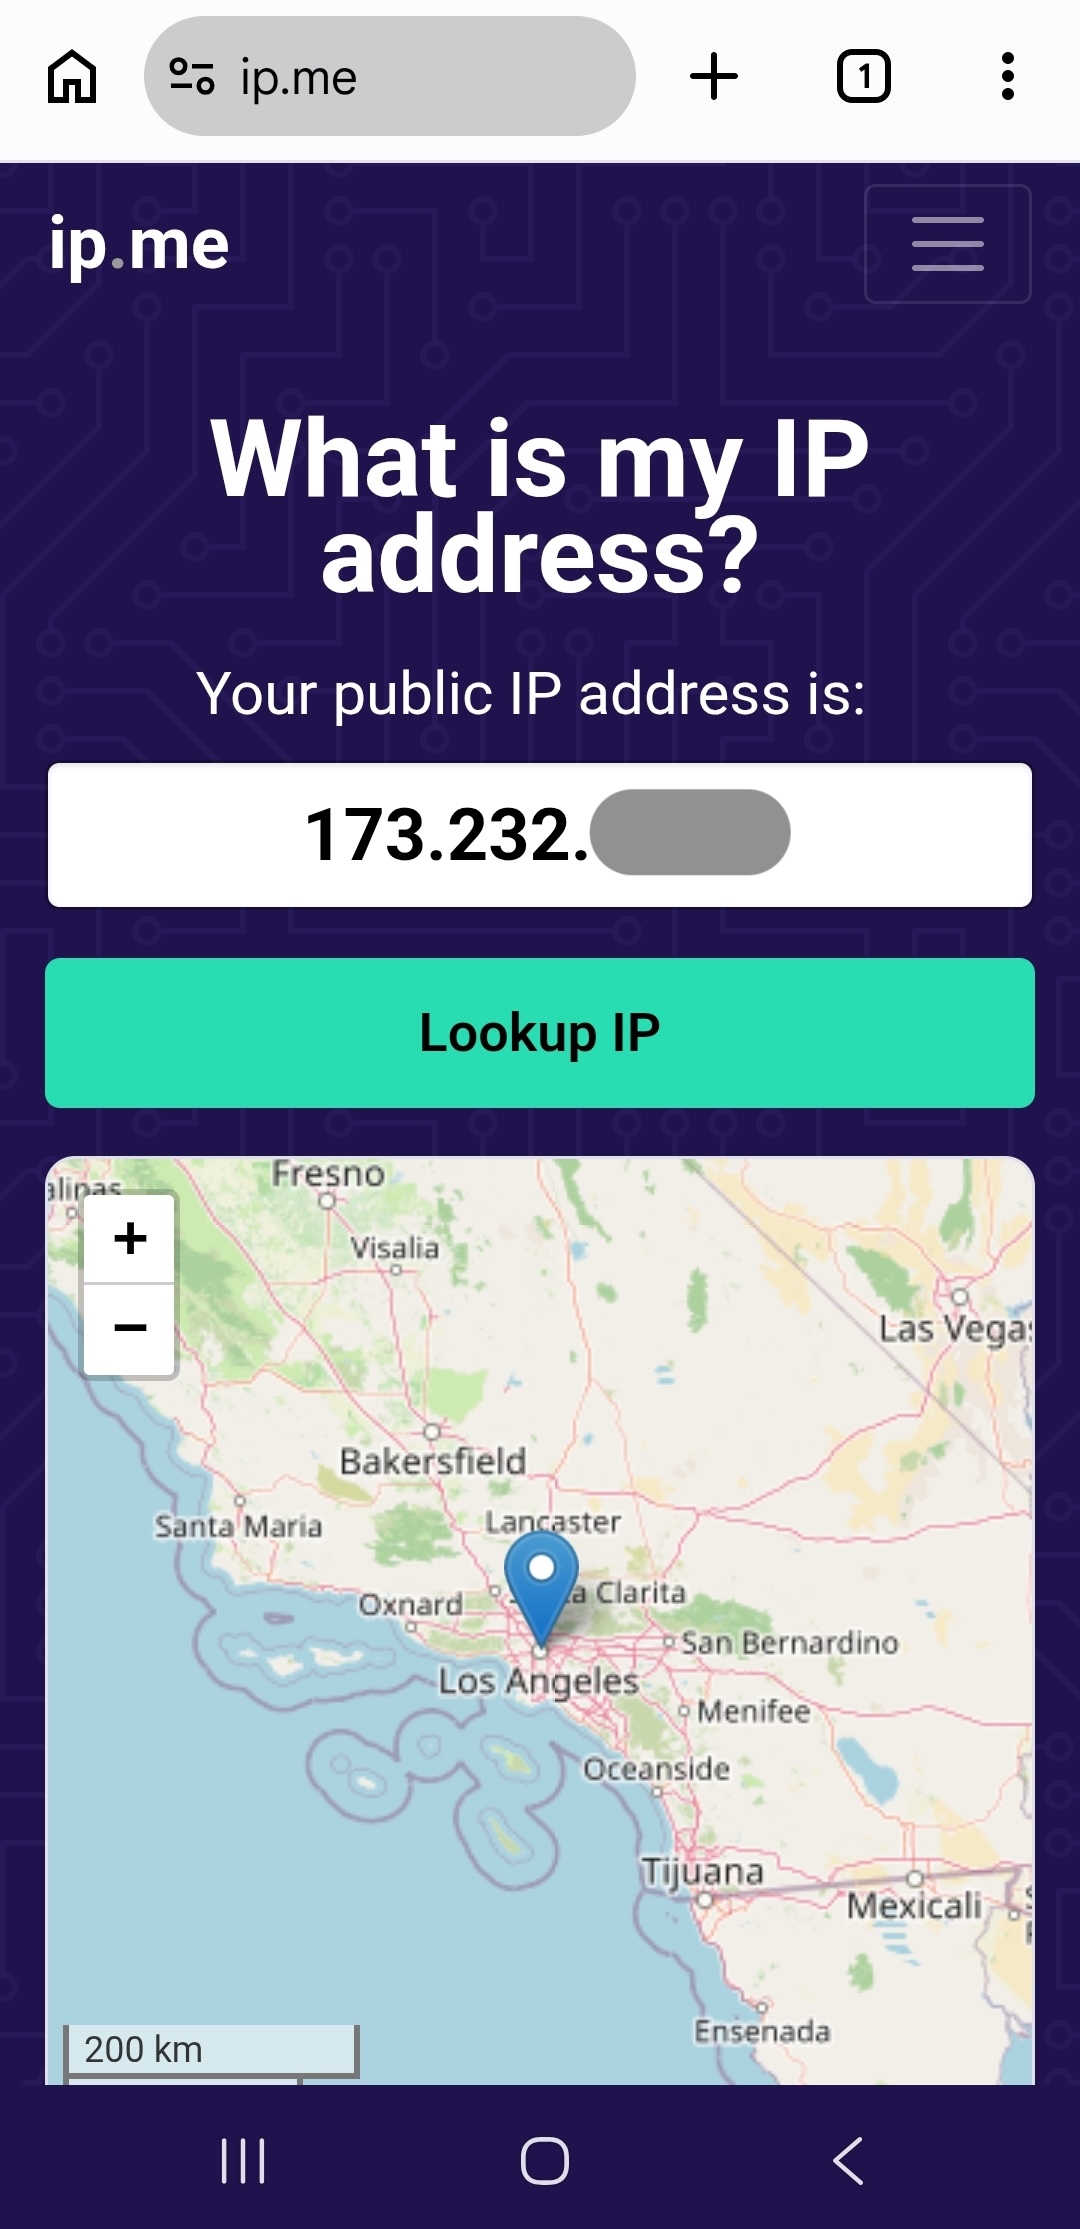
With the app connected and “Clash Proxy Chain (GetIPProxy)” selected, check your public IP on an IP lookup site. It should match the IP for your proxy in Dashboard → My Proxies.
Troubleshooting
FlClash shows the old proxy list
Return to Config and confirm the edited local profile is selected. If you changed the YAML after importing it, import the updated file again and select that copy before opening Proxy → GLOBAL.
Clash Proxy Chain (GetIPProxy) does not appear
Make sure the app loaded your edited local file. Check the YAML indentation, confirm there is only one top-level proxies: key, and reload the configuration.
Clash Proxy Chain (GetIPProxy) cannot connect
Test the first-hop node on its own. Then check the SOCKS5 proxy address, port, credentials, and the exact node name in dialer-proxy.
The IP lookup site still shows the first-hop IP
Make sure Global mode is active and “Clash Proxy Chain (GetIPProxy)” is selected. Reload the edited configuration if needed.
The proxy disappears after a subscription update
The downloaded configuration replaced your local edits. Add the GetIPProxy entry to the new YAML file and import that updated copy.
Optional: use a first-hop group or rule mode
Choose the first hop with a proxy group
The dialer-proxy value can refer to an existing select group instead of a single node. Do not let that group select “Clash Proxy Chain (GetIPProxy)” or another group that routes back to it, or you will create a loop. Start with one working node.
Use the proxy in rule mode
Add “Clash Proxy Chain (GetIPProxy)” to the select group used by your rules, then select it in that group. Global mode makes the first exit IP check simpler.
Common questions
Which IP address will websites see?
When you select “Clash Proxy Chain (GetIPProxy)”, websites see the GetIPProxy exit IP. The first-hop node connects to the GetIPProxy proxy.
Can I use a different Clash client?
This configuration works with clients that use a Mihomo core supporting dialer-proxy. The controls may differ, so use instructions for your client when available.
Configuration references
This independent GetIPProxy guide does not imply a partnership with the app developers.